Looking for a way to entertain your kids while helping them learn something new? These 8 hands-on science experiments are a fantastic way to combine fun with education. Using everyday items you already have at home, your children can explore cool scientific reactions, create colorful results, and discover how the world around them works; all without needing a lab coat.
Hands-on experiments you can easily do at home...
If you don't recognize yourself in the mirror these days, it's most likely because you've grown a kooky-looking hairdo by now. The good news is that with a white lab coat (white pajamas will do too), you can pass yourself off as a mad scientist and no one would be any the wiser. So grab your goggles, huddle up your little Einsteins and learn about science in a super fun way.
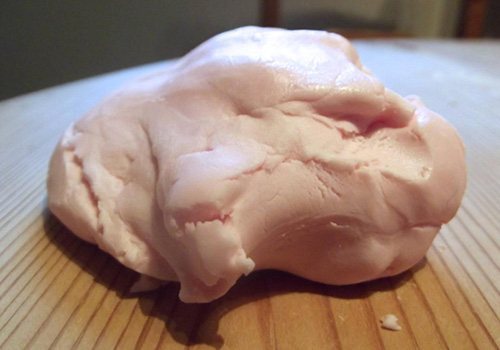
1. Make Your Own Squishy Soap
Image: creativeplayhouse.comMaking your own soap can be some messy fun! All you need is a couple of ingredients that you probably have lying around at home.
--WHAT YOU'LL NEED--
1/2 cup corn flour
4 tbsp liquid soap (even dish liquid will do)
4 tsp cooking oil
Food colouring
--STEP 1--
Use a spoon to mix the corn flour and liquid soap in a medium-sized bowl. Then pour in the cooking oil and stir.
--STEP 2--
Drop a good squirt of food colouring into the mix and stir.
--STEP 3--
Knead the mixture until you've got a lump with somewhat even colouring.
--STEP 4--
Break off a small piece of the lump and use as soap the next time your little ones need to wash their hands.
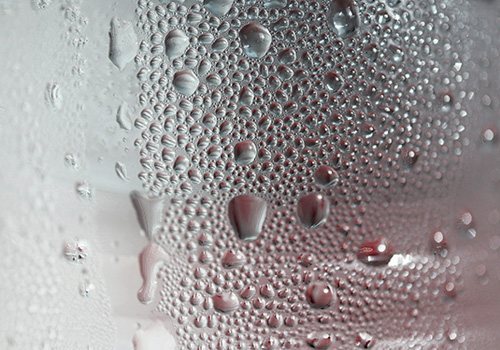
2. Make It Rain Indoors
Want to experience different weather at home? Why not make it rain indoors!
--WHAT YOU'LL NEED--
Glass jar
Plate
Water
Ice cubes
--STEP 1--
Heat your water until it is steaming.
--STEP 2--
Pour the hot water into a jar until it is about 1/3 filled. Put a plate on the top of the jar. Wait a minute or two before the next step.
--STEP 3--
Put the ice cubes on top of the plate and watch closely to see what happens inside the jar.
--STEP 4--
Streaks of water will run down the side of the jar, making rain!
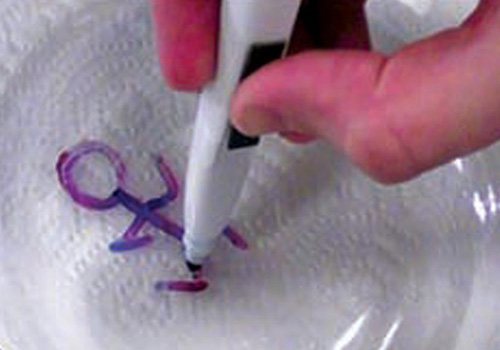
3. Watch A Stickman Move
Image: sciencefun.org
A simple and fun experiment that'll leave your littles amazed as they see their drawings pop off the glass.
--WHAT YOU'LL NEED--
A glass plate, bowl, or picture frame
Dry erase marker
Water
--STEP 1--
Draw a simple picture on the glass. A stick figure is a good one to start with.
--STEP 2--
Slowly pour water onto the plate or into the bowl to lift up the drawing
--STEP 3--
Swirl the water around to make the picture dance and move
4. Create A Rainbow In A Glass
Image: sciencefun.org
Create a rainbow in a glass using Skittles, water, and density!
--WHAT YOU'LL NEED--
Water
A mug
5 separate cups
A Tablespoon
A clear glass
A dropper or pipette
--STEP 1--
Separate the Skittles into the cups, in these amounts: 2 red, 4 orange, 6 yellow, 8 green, and 10 purple.
--STEP 2--
Heat a mug of water in the microwave for a minute and a half (or long enough that the water is hot, but not boiling). Be careful removing the water from the microwave–it’s hot!
--STEP 3--
Measure and pour two tablespoons of hot water into each cup, on top of the Skittles.
--STEP 4--
Stir each cup carefully so no water splashes out. The cups need to be cool for the next part of the experiment, so leave them somewhere where they won’t get knocked over. Stir them every ten minutes or so until the Skittles are dissolved and the water is room temperature.
--STEP 5--
Using the dropper, add the coloured water from the five cups to the clear glass. Start with purple, then add green, then yellow, orange, and red last. Go slowly here, we don’t want the different layers to mix.
--STEP 6--
Congratulations, you made a rainbow. You didn’t even have to go outside!
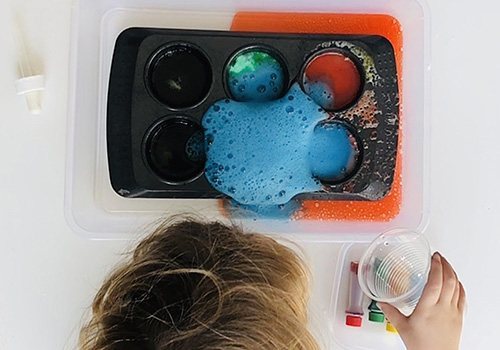
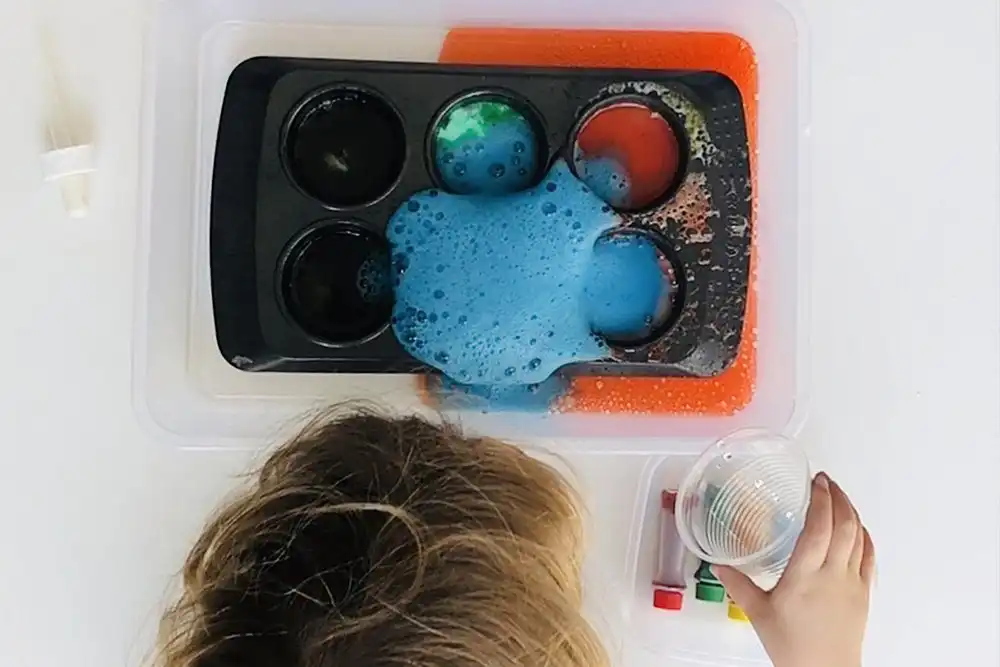
5. Watch An Explosion Of Colours
A fun and easy baking soda and vinegar experiment that will have your kids jumping around in excitement as they witness a splash of colours exploding right before their eyes!
--WHAT YOU'LL NEED--
Baking Soda
Vinegar
Food Colouring
Muffin Tray (or small see-through cups)
Tray (to limit the mess!)
An empty bottle or a cup to pour the vinegar
--STEP 1--
Insert a few drops of food colouring in each container in the muffin tray. You can mix and match some colours if you want more options.
--STEP 2--
Cover the colours with a teaspoon of baking soda (try to do this part before showing your kids to keep the element of surprise once the colours start popping up!)
--STEP 3--
Ask your child to pour some vinegar on the baking soda and watch the excitement on their faces as colours start exploding from the muffin tray!
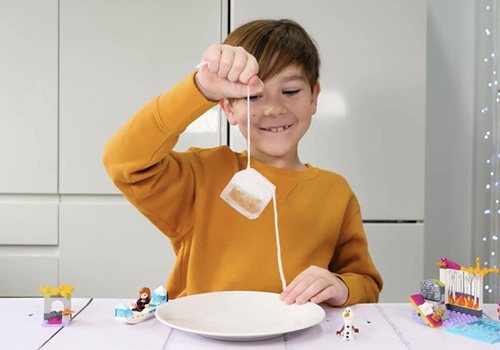
6. Experiment With Frozen Water
Image: The Dad Lab (YouTube)
This "magical" experiment is super simple and will amaze your little ones.
--WHAT YOU'LL NEED--
Plate
Ice Cube
String
Glass of Water
Salt
--STEP 1--
Dip the string into the glass of water to wet it
--STEP 2--
Place the string on top of the ice cube and sprinkle salt on top of it
--STEP 3--
Count to 10 then pull one side of the string to see what happens!
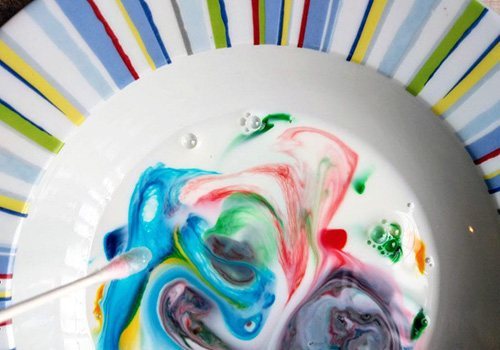
7. Make Colour-Changing Milk
Image: sophieplayroom.comFind out what happens when you a little milk, food colouring, and a drop of dish detergent.
-- WHAT YOU'LL NEED --
Milk
Dinner plate
Food colouring (red, yellow, green, blue)
Dishwashing soap
Cotton swabs
--STEP 1--
Pour enough milk in the dinner plate to completely cover the bottom to the depth of about 1/4". Allow the milk to settle.
--STEP 2--
Add one drop of each of the four colours of food colouring — red, yellow, blue, and green — to the milk. Keep the drops close together in the center of the plate of milk.
--STEP 3--
Find a clean cotton swab for the next part of the experiment. Predict what will happen when you touch the tip of the cotton swab to the center of the milk. It's important not to stir the mix. Just touch it with the tip of the cotton swab.
--STEP 4--
Now place a drop of liquid dish soap on the other end of the cotton swab. Place the soapy end of the cotton swab back in the middle of the milk and hold it there for 10 to 15 seconds. Look at that burst of color!
--STEP 5--
Add another drop of soap to the tip of the cotton swab and try it again. Experiment with placing the cotton swab at different places in the milk. Notice that the colours in the milk continue to move even when the cotton swab is removed.
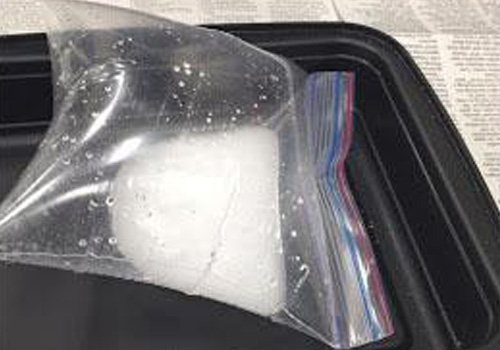
8. Explode A Bag
Image: sciencefun.orgA fun experiment that'll get your boys and girls bursting with excitement.
--WHAT YOU'LL NEED--
Baking pan or bowl
Ziploc sandwich bags
Baking soda pouches
1/3 cup vinegar
--STEP 1--
Measure 1 rounded tablespoon of baking soda into a square of single-ply toilet paper. Fold horizontally and secure with a small piece of tape, then fold vertically and wrap it all the way around with a large piece of tape, ensuring it will stay closed.
--STEP 2--
Measure out 1/3 cup of vinegar and pour it into the bag. Then close the bag so it doesn't spill.
--STEP 3--
Open the bag slightly to allow an empty portion to hang over the edge of pan and add the baking soda pouch so that it does not touch the vinegar.
---STEP 4--
Zip the bag shut without mixing the chemicals yet.
--STEP 5--
Lift the bag, allowing the chemicals to mix. Shake 3 times, place in pan or bowl and observe what happens.
--- Want more ideas for science fun at home? Get Kidzapp now!


 Apr 15, 2025
 Posted by: Kidzapp Team